New Microsoft Windows Nano server 2016 provides and offers many new benefits over traditional windows server operating system. It is very cost effective to run nano server Amount of resources required to run nano server is very low. also due to its striped down GUI architect (no GUI layer at all) and low reduced OS footprint. Saves lots of cost hardware and energy required. Fewer reboots required, Due to reduced operating system footprint less patches are required and as so few reboots. It boots faster than earlier windows OS, low disk size required, increased security and many more other new features.
CONFIGURING AND MANAGING MICROSOFT WINDOWS NANO SERVER
Installing Nano server has different process than traditional one and first need to create VHD image from the Windows Server 2016 OS ISO image. I have downloaded evaluation Windows Server 2016 OS ISO from www.microsoft.com and mounted it on my desktop, I require NanoServer folder from the CD/DVD. I have copied it on my C:\Temp drive. All the required Nano WIM image and scripts are available in the folder.
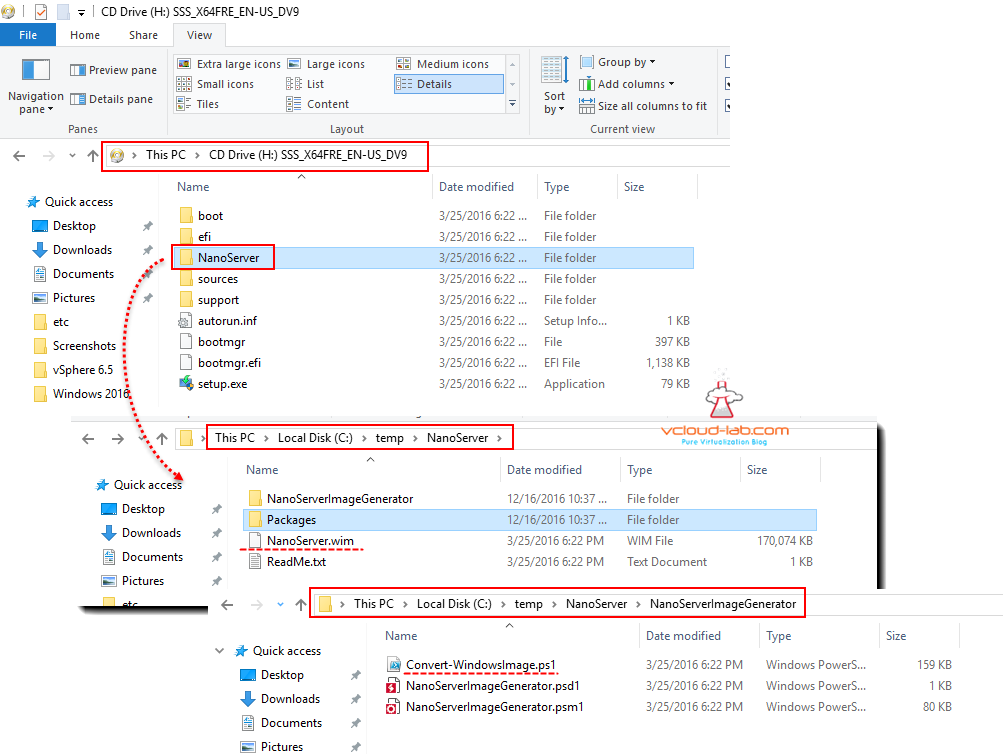
Open windows Powershell as administrator. First 2 commands cd and dir are to view the contents in the folder. Import the powershell nanoserver module with below command.
Import-Module .\nanoserver\nanoserverImageGenerator\nanoServerImageGenerator.psm1
Once powershell module is imported there are 3 new commands available to create/modify nano image, Edit-NanoserverImage, Get-NanoServerPackage, New-NanoServerImage.
I will be using nanoserver.wim to create images under nanoserver folder and using single New-NanoServerImage cmdlet to genrate nano vhd image.

-BasePath C:\Temp\NanoServer\Base `
-Targetpath C:\Temp\NanoServer\Nano.vhd `
-ComputerName NanoServer01 `
-Package 'Microsoft-Nanoserver-Compute-Package', 'Microsoft-NanoServer-OEM-Drivers-Package', 'Microsoft-NanoServer-Storage-Package', `
-DeploymentType Host `
-Edition DataCenter `
-AdministratorPassword (ConvertTo-SecureString -String 'Computer@1' -AsPlainText -Force)
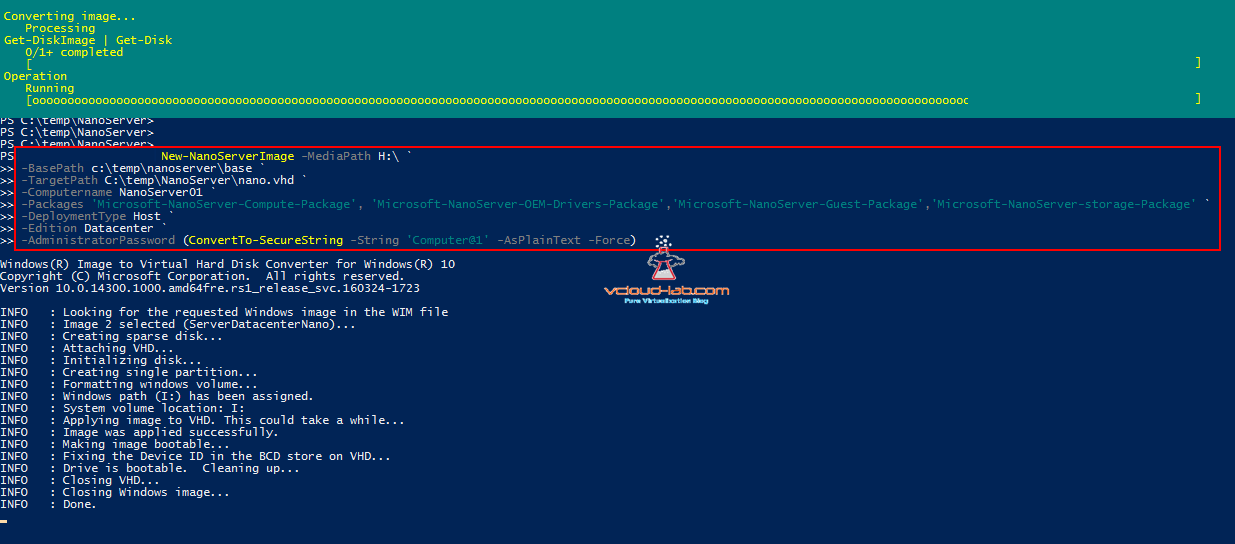
New-NanoServerImage is used to to create image and below are the parameters breakdown. Once executed you can see the status progress bar on the top.
-MediaPath: is ISO cd/dvd path of windows 2016 server, It requires sources folder from the mounted ISO.
-BasePath: Here all the wim files and other required files are copied, it will be writable local drive path.
-Targetpath: This is a folder location where new nano VHD file is generated and created.
-ComputerName: This will be the nano server hostname, and assigned while creation image (With additional parameters it is also possible to provide IP address).
-Package: Currently I am installing only Storage and HyperV packages. All the packages can be found under nanoserver\packages folder, also I have mentioned all the available packages on the ISO as after this paragraph.
-DeploymentType: There are 2 options here Host and Guest, Host is used for Bare metal and Guest is used for VM image, As I am planning for HyperV as VM. I am selecting Host.
-Edition: This is self explanatory and selecting datacenter edition.
-AdministratorPassword: it should be encrypted using command (ConvertTo-SecureString -String 'Password' -AsPlainText -Force).
Below are the packages list can be used to install and found under packages folder.
Microsoft-NanoServer-BootFromWim-Package
Microsoft-NanoServer-Compute-Package
Microsoft-NanoServer-Containers-Package
Microsoft-NanoServer-DCB-Package
Microsoft-NanoServer-Defender-Package
Microsoft-NanoServer-DNS-Package
Microsoft-NanoServer-DSC-Package
Microsoft-NanoServer-FailoverCluster-Package
Microsoft-NanoServer-Guest-Package
Microsoft-NanoServer-Host-Package
Microsoft-NanoServer-IIS-Package
Microsoft-NanoServer-NPDS-Package
Microsoft-NanoServer-OEM-Drivers-Package
Microsoft-NanoServer-SCVMM-Compute-Package
Microsoft-NanoServer-SCVMM-Package
Microsoft-NanoServer-SecureStartup-Package
Microsoft-NanoServer-ShieldedVM-Package
Microsoft-NanoServer-Storage-Package
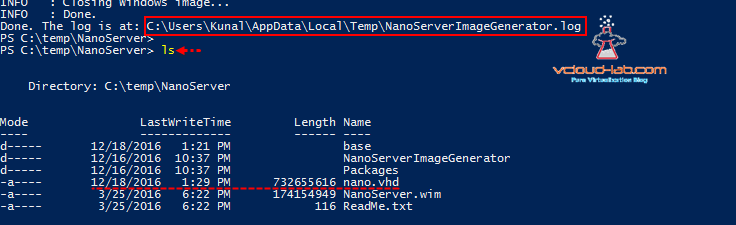
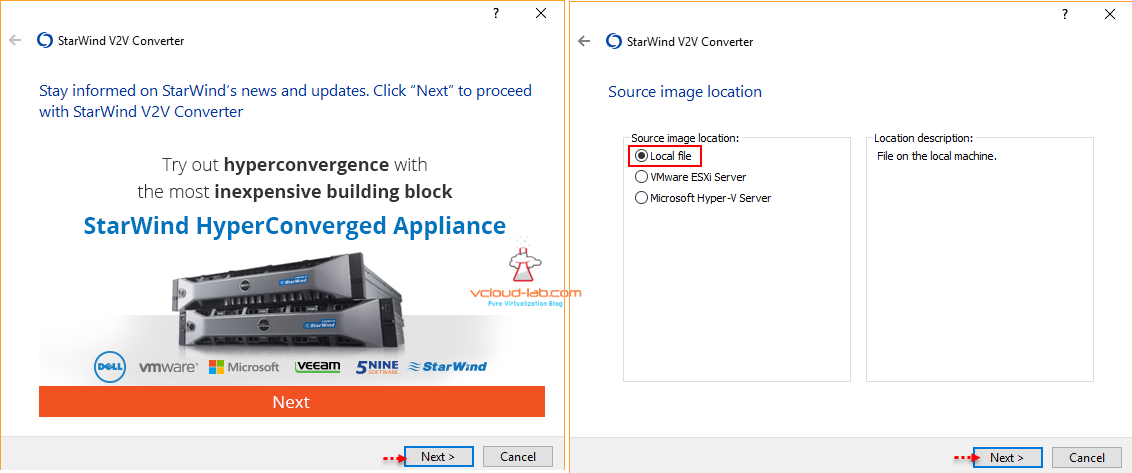
On the Target path new VHD file is created, As I am using VMware workstation, and this VHD cannot be used with it, I will need it to be converted to VMDK file format first. for this there is a free tool available startwind V2V (virtual to virtual) converter on http://www.starwindsoftware.com/converter.
Registration is required before downloading V2V (virtual to virtual) converter software, it send the download url on registration email id for virtual to virtual (V2V) converter software, Once downloaded, setup it and execute to start wizard, choose the source image location as local file, in my case there is a VHD file on my local folder location c:\temp\nanoserver.
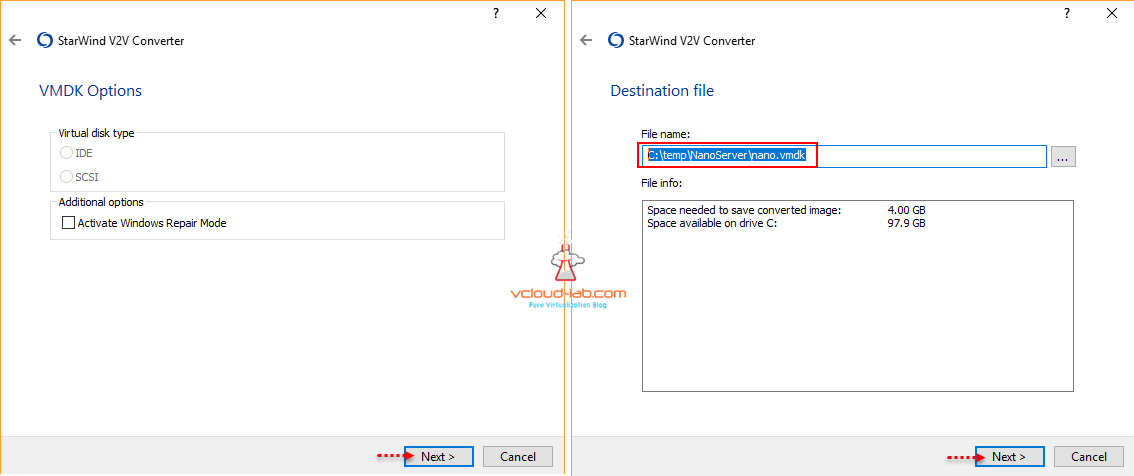
Select the newly created Nano.VHD, check the size it is only 4 GB (Also can be installed on Pen drives). On the next screen select the destination desired image format you want to convert to, VMware Esx server image, This format file is VMware server virtual disk image (VMDK), and it is thick disk, Disk space for this image is allocated at the creation time and does not change over time, click next.

I am keeping VMDK options default, click next to select the file name and location of the new nano VMDK. make sure you have enough space on the disk, note down it will be thick disk and it is only 4 GB os virtual disk in size.
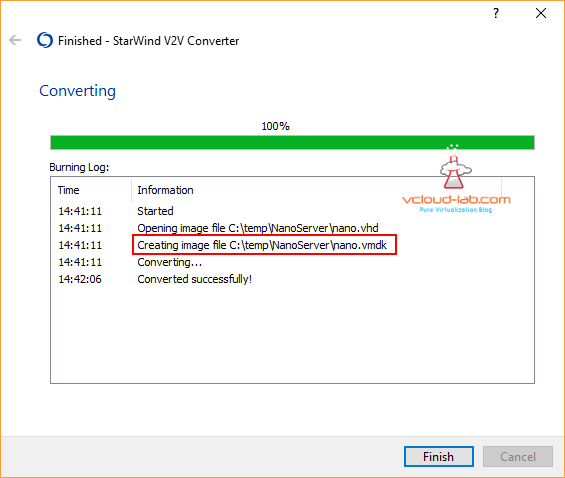
It will take 1 or 2 minutes to convert file from vhd to vmdk. Once everything is successful, new disk is created and it is ready to attach in the new VM.
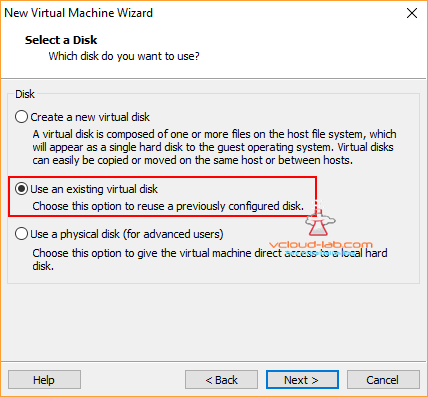
I have already written past article on creating VMs on VMware Workstation, PART 7 : CREATING NESTED VMWARE ESXI SERVER VM IN HOME LAB ON VMWARE WORKSTATION, Use the same article to deploy new Virtual machine, except In the wizard while selecting a disk, choose option Use an existing virtual disk.
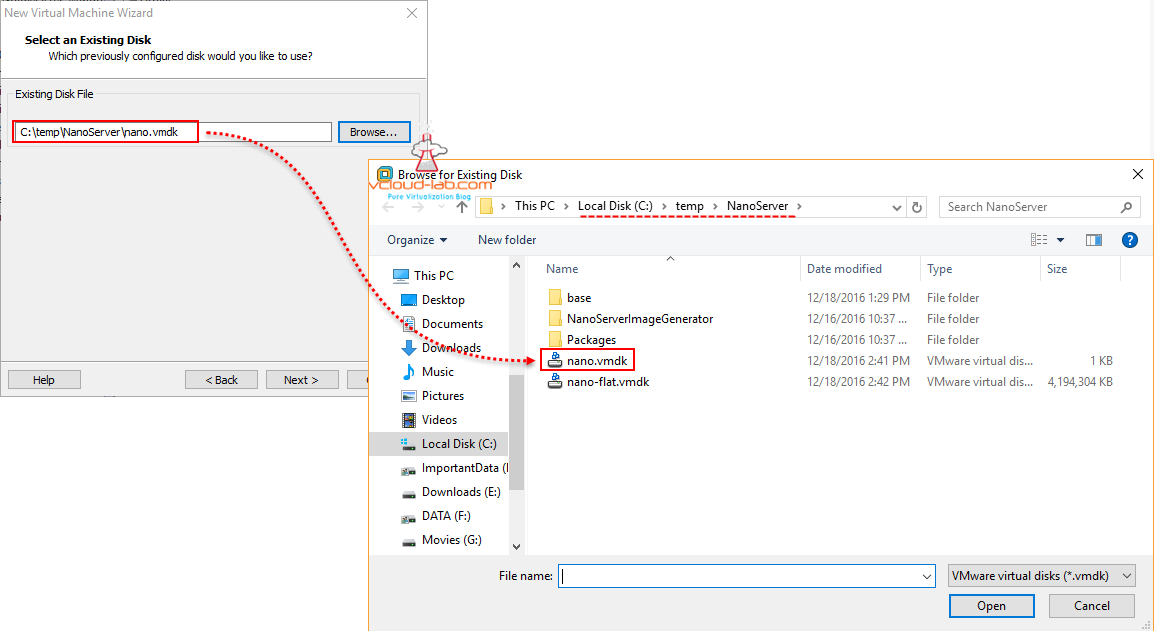
While browsing vmdk in the folder, select the nano.vmdk, This is a descriptor file and only around 1 KB in size and actual data resides on another disk nano-flat vmdk.
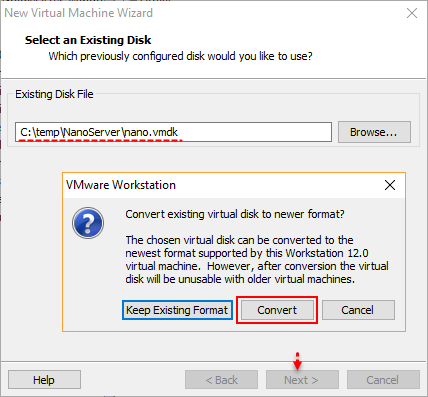
Convert the existing vmdk virtual disk to newer format if you require, once converted vmdk it will be unusable with older version of VMware Workstation.
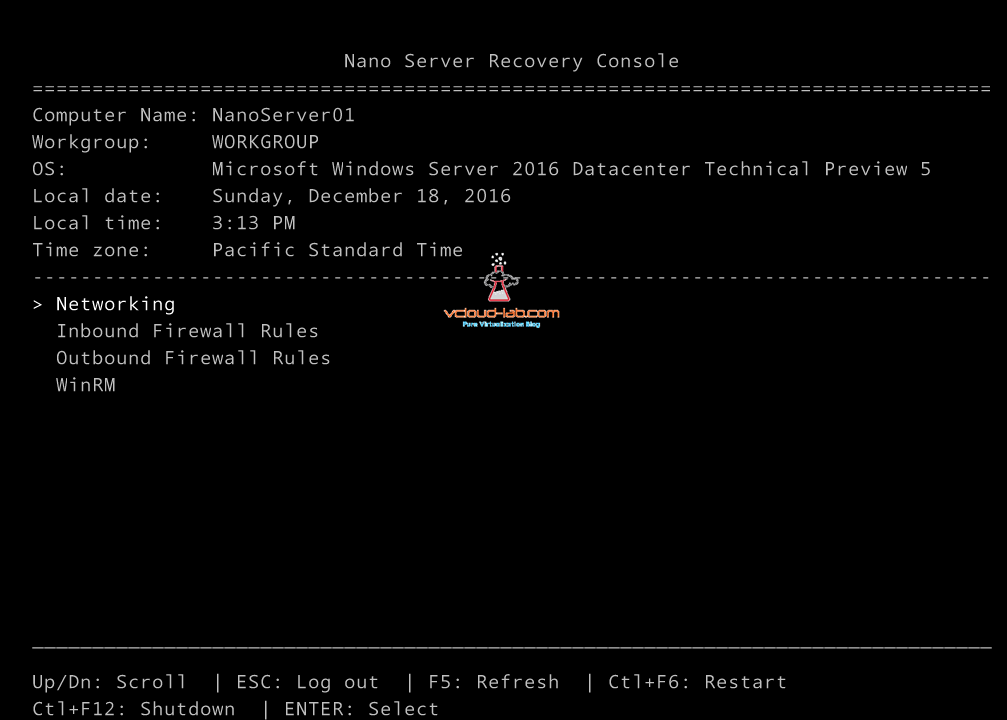
Once VM is completed with mapping existing VMDK disk, Power it on, and provide administrator as user name and password is the same one mentioned while creating nano image using PowerShell. It looks something similar to Esxi login screen and further configuration is also somewhat same like esxi.
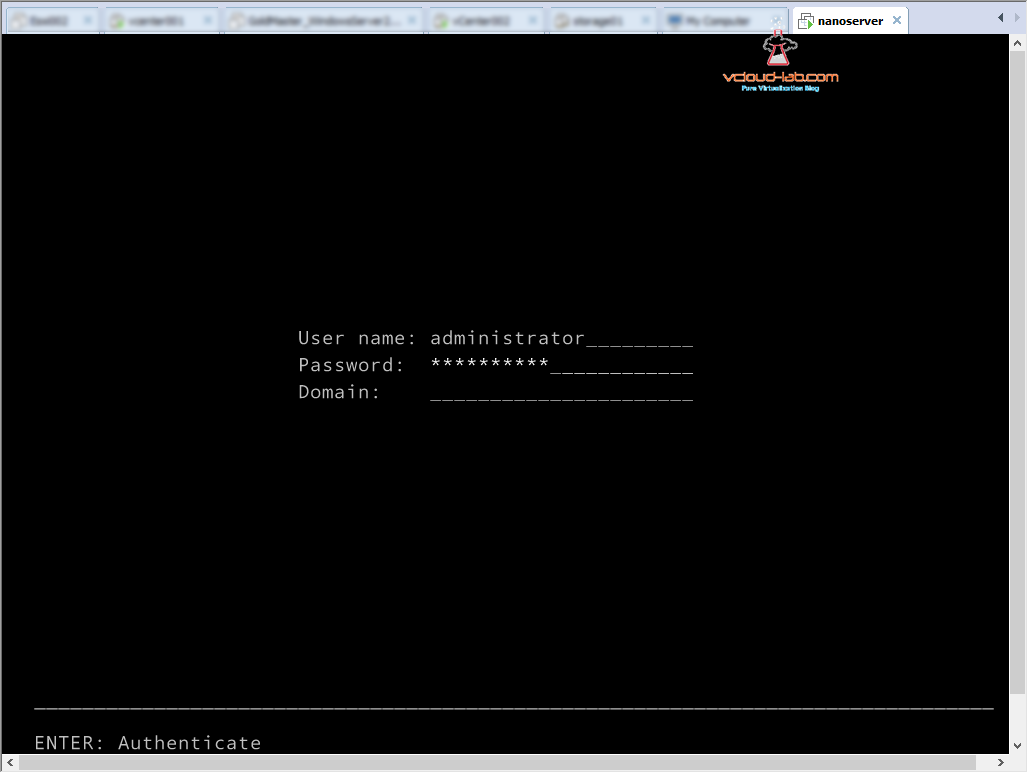
It opens nano server recovery console. Go to networking and hit enter to configure IP address (This step is possible while nano image creation as well). I will be configuring nano and coming up with further steps in next article.